
|

|
|
|
My RV-8 build
|
Date: 2-25-2013
|
Number of Hours: 1.00
|
Manual Reference: Page 8-15
|
Brief Description: Lower longeron bending #1
|
|
Entry #1
This step will be done in three entries on this date to assist others when they get to this stage.
I've done quite a bit of research and reviewing of other build sites to get my head around it. Unfortunately, there are not a lot of sites that go into great detail in how to do this step.
So, I took quite a few pictures as I went step by step.
First, I marked both the left and right F-843's
Drawing 66 is specific to the F-843-L, so I took the pictures to be reflective of that.
To get your head around the ends, just take the F-843-L, marry it up to the fuse and mark the AFT and FWD locations. The factory bend puts the smaller piece as the AFT piece.
So, I took the longer side of the factory bend (FWD end) and kept it on my side of the vice. The angles towards my right arm. So if the AFT end is facing north as in picture #1, the FWD end should be pointing south south east...the Vertex is to the right with the one flange horizontal with the table and the other flange vertical on the right. See picture #1.
Picture #2 shows that DWG 66 is reflective of picture #1
Once you're good to go, clamp the digital level to the F-843-L and zero it.
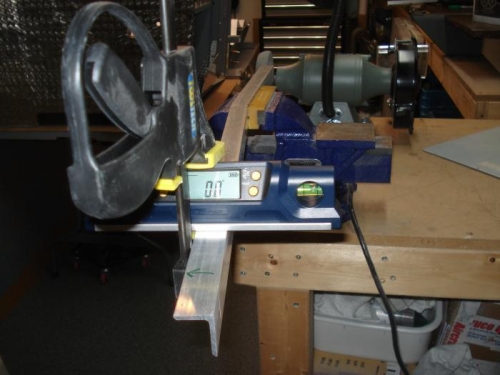
Start twisting to the left or counter clockwise in increments.
With the F843-L set in the vice like this, the diagram has you placing your adjustable wrench on your right side with the vertical flange with the adjustable coming from underneath. The green arrow in picture #1 is a reminder to twist counter clockwise.
|
|
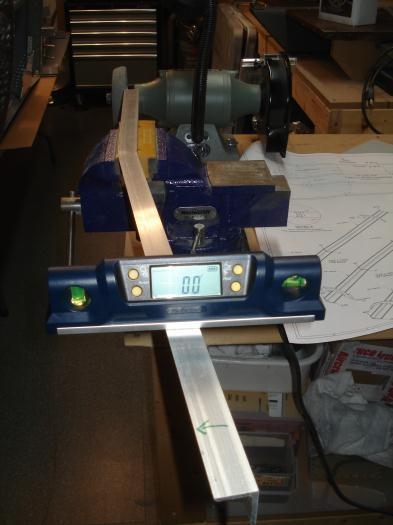
F-843-L in the vice and digital level zeroed.
|
|

DWG 66 reflects the picture in the vice.
|
|
Clamp the level to the F-843-L
|
|
|
|
|
|
|
|
|
Copyright © 2001-2024 Matronics. All Rights Reserved.
|